
No Bake Salty (savoury) Cheesecake
🥧 Αλμυρό Cheesecake χωρίς ψήσιμο
Carob is the new healthy trend!
🍹
Carob is the new healthy trend! 🍹

SERVES 🍴⃒ PREP. TIME 🕔⃒
6-8 pers. 15 min. + 1 h. wait
COOK. TIME ♨ DIFFIC. LEVEL 👩🍳⃒
- Easy
For some reason we are used to having “Cheesecake” as dessert.
So today I’ll break the norm and show you how to create a salty Cheesecake.
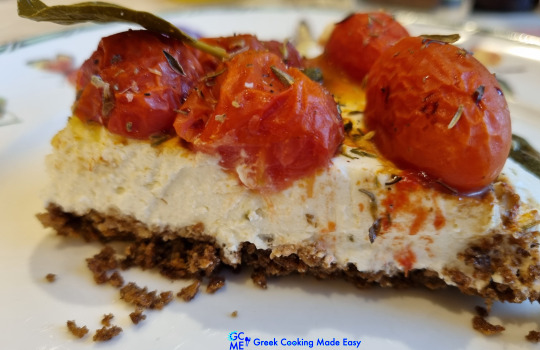
A crunchy base of carob and rye, a lush cheese filling and a gorgeous garnishing with tomatoes confit and capers is all it takes to make it.
It’s actually a very easy dish to prepare but will stand quite impressively at your party’s buffet or an intimate dinner.
And wait until you taste it! Are you interested to learn how to prepare this trendy dish?
Suitable for lacto-vegetarians.
INGREDIENTS
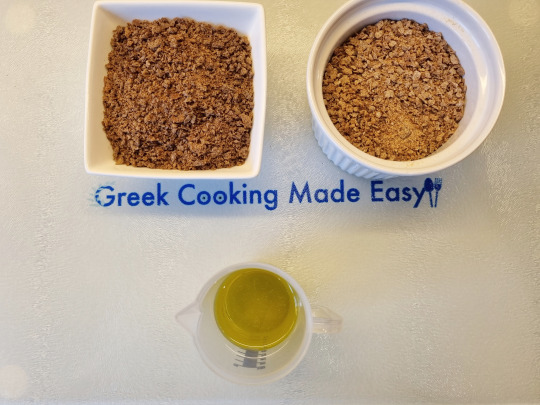
Ingredients for the crunchy Base:
• 60 gr / 2.1 oz Carob flour thin Rusks, crumbled
• 60 gr / 2.1 oz Rye or Barley thin Rusks, crumbled

• 75 ml / 0.3 cup extra virgin Olive Oil (EVOO)
Ingredients for the Cream Cheese filling:
• Almost 1 cup / 200 gr / 7 oz Philadelphia Cream Cheese, 0% fat
• 1/3 cup / 100 gr / 3.5 oz Greek Strained Yoghurt, 0% fat
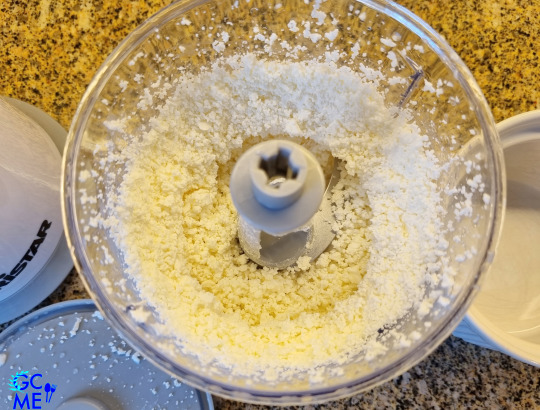
• 150 gr / 5.3 oz Feta cheese, finely crumbled in food processor
• Some refined white Pepper

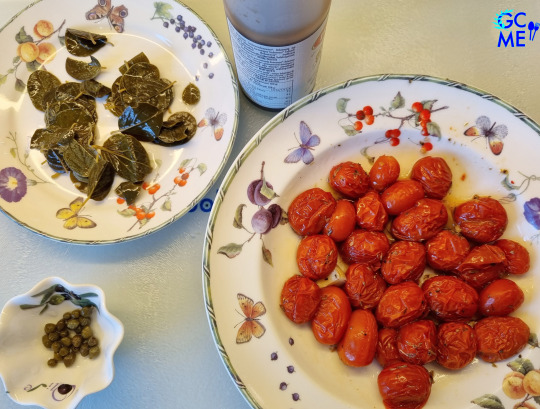
Ingredients for the Topping/garnishing:
• 250-300 gr / 8.8-10.5 oz Mini Tomatoes Confit, strained
• 25 small Capers, strained
• About 35 pickled Caper Leaves, strained
• ½ tsp. dry Oregano (optional)
• A few drops of Balsamico Cream
METHOD:
A. Prepare the base:
Note: There are 2 ways to crumble the thin carob and rye rusks: in a food processor or a blender.
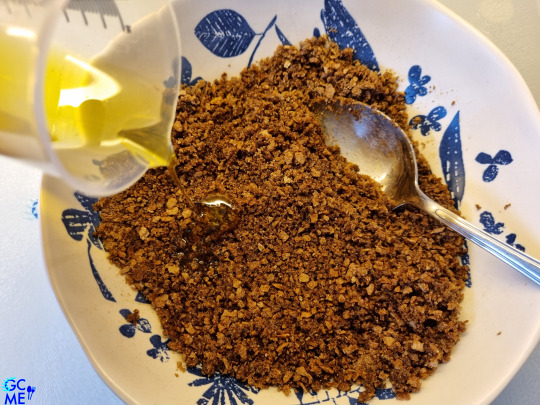
* Using a food processor, makes them coarsely crumbled. When mixed with the Olive oil, you get a crumbly but crunchy base.
* Using a blender, makes them finely crumbled. When mixed with the Olive oil, you get a more solid base, not crumbly but not that crunchy. I used the food processor.
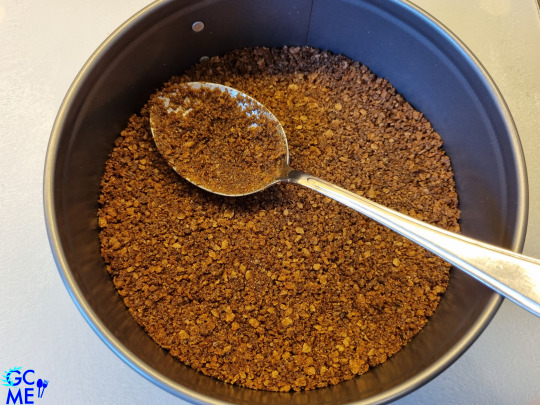
1. In a large bowl, mix together the 2 types of crumbled rusks and blend them well.
2. Pour in the Olive oil and stir to wet the crumbles and to incorporate it.
3. Place the mix at the bottom of a Spring form (with side opening) of 18 cm / 7 in. and with your spoon press it to cover the whole area and to level it.
4. Cover the form with plastic wrap and place it in the fridge to chill for at least 1 hour.
B. Prepare the Cream Cheese filling:
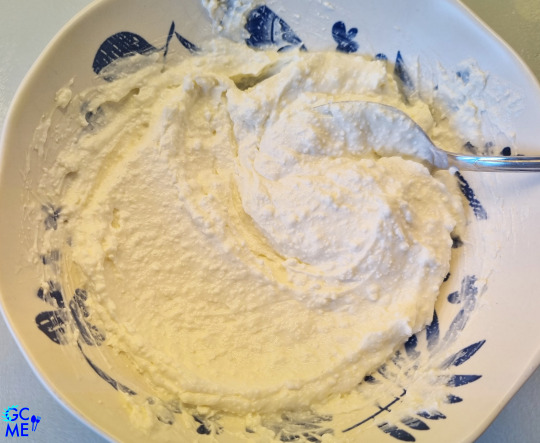
5. In a large bowl, mix together the yoghurt, cream cheese and crumbled feta.
6. Sprinkle also some refined white Pepper.
7. Blend until the cheeses are homogenized.
8. Cover bowl with plastic wrap and place in the fridge to chill for at least 1 hour.
C. Make the Cheesecake:
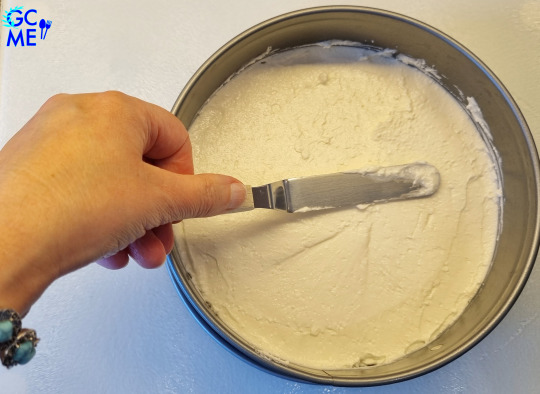
9. After at least one hour, bring the base and filling from the fridge.
10. With a spatula, cover the base with the filling and then level its surface.
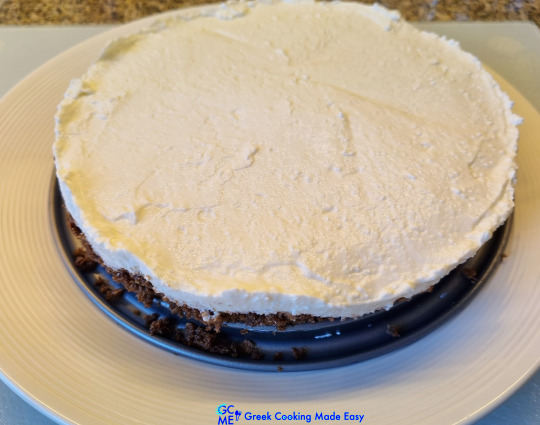
11. Gently open and remove the sides of the spring form.
12. Place the Cheesecake on a nice, round serving platter.
D. Garnish the salty Cheesecake just 30 min before serving:
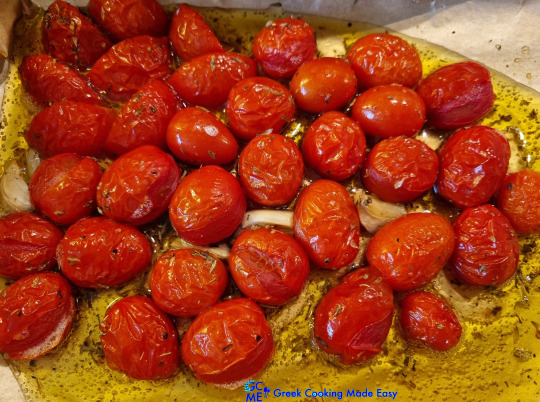
13. Bake the tomatoes in the oven. Remove and let them cool down. You could that many days before.
14. Place the pickled caper leaves and the capers in a thick kitchen paper to absorb all liquids.

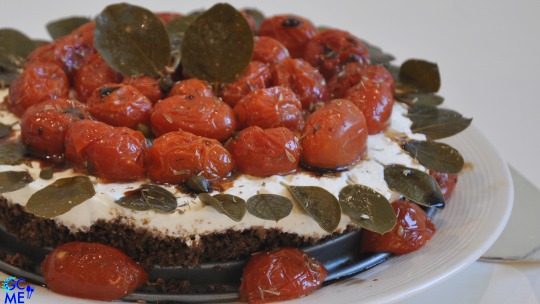
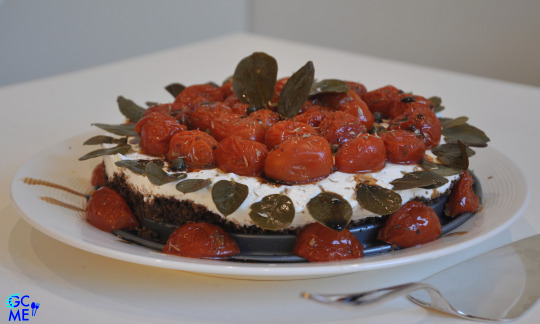
15. Garnish the Cheesecake by placing the caper leaves all around the edges of the cake.

16. Then spread the confit tomatoes in the middle of the cheesecake. Don’t use the oil that they were cooked in.

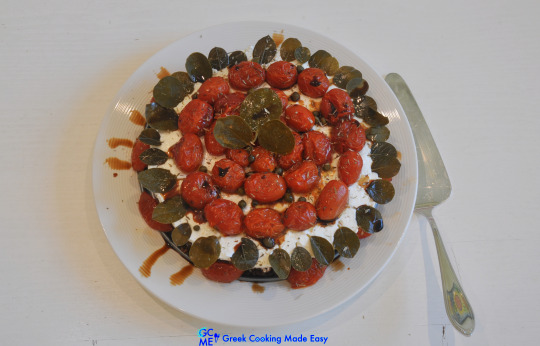
17. Scatter the small capers around the tomatoes.
18. In the middle, put a few caper leaves to garnish the cake further.
19. Make small corrections on your topping.
20. Optionally, you could sprinkle some oregano on top.
21. And for the finishing touch, drizzle some drops of the balsamico cream to decorate the cake.
22. Place the Cheesecake in the fridge 15’ before serving.
23. And serve chilled!
E. Serving suggestion:
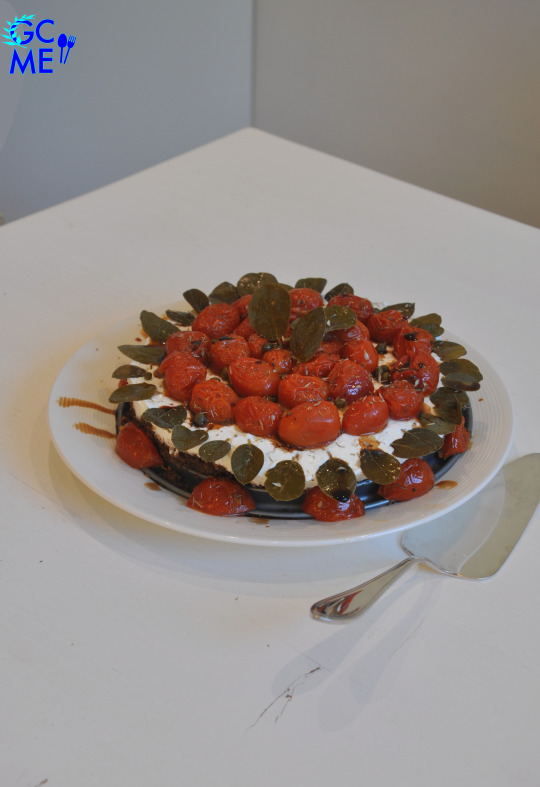
Salty Cheesecake is the ideal, easy cold dish to be served as appetizer or 1st course.
Perfect also for Cocktail parties to be placed as a centerpiece at your buffet.
The combination of the crunchy, earthy base with the tangy, light cheesy filling and the sweetness of the tomatoes with a touch of pungency from the capers is simply unique.
Who says Cheesecakes have to be sweet? I say no way! And isn’t this sooo pretty!?
Enjoy it.

F. Storage info:
Both the base and filling can be stored separately, in containers, in the fridge for up to 4 days. The garnishing has to be done last min before serving and then Cheesecake should be consumed entirely.
Check my YouTube Video: HERE
Αλμυρό Cheesecake χωρίς ψήσιμο
BY: Greek Cooking Made Easy
SUBSCRIBE TO MY YOUTUBE CHANNEL: https://youtube.com/greekcookingmadeeasy
ΜΕΡΙΔΕΣ🍴⃒ ΠΡΟΕΤΟΙΜΑΣΙΑ 🕔⃒
6-8 15 min. + 1 h. Αναμονή
ΜΑΓΕΙΡΕΜΑ ♨ ΒΑΘΜ.ΔΥΣΚΟΛΙΑΣ 👩🍳⃒
- Εύκολο
Για κάποιο λόγο έχουμε συνηθίσει να τρώμε "Cheesecake" σαν επιδόρπιο.
Σήμερα λοιπόν για να ξεφύγω από τα συνηθισμένα θα σας δείξω πώς να φτιάξετε αλμυρό Cheesecake.
Τραγανή βάση από χαρούπι και σίκαλη, πλούσια γέμιση τυριών και μια υπέροχη γαρνιτούρα με ντοματίνια κονφί και κάπαρη είναι ό,τι χρειάζεστε για να το φτιάξετε.
Στην πραγματικότητα είναι ένα πολύ εύκολο πιάτο στην ετοιμασία, αλλά θα σταθεί εντυπωσιακά στον μπουφέ σας σε πάρτι ή σε καθιστό δείπνο.
Και περιμένετε μέχρι να το γευτείτε! Σας ενδιαφέρει να μάθετε πώς να φτιάξετε αυτό το τρέντυ πιάτο;
Κατάλληλο για χορτοφάγους.
ΥΛΙΚΑ
Υλικά για την τραγανή βάση:
• 60 γρ / 2,1 oz λεπτά Παξιμάδια από Χαρουπάλευρο, θρυμματισμένα
• 60 γρ / 2,1 oz, λεπτά Παξιμάδια από Σίκαλη ή κριθάρι, θρυμματισμένα
• 75 ml / 0,3 φλ. εξαιρετικό παρθένο Ελαιόλαδο
Υλικά για τη γέμιση με τυρί κρέμα:
• Σχεδόν 1 φλ. / 200 γρ / 7 oz Τυρί Κρέμα τύπου Philadelphia, 0% λιπαρά
• 1/3 φλ. / 100 γρ / 3,5 oz Γιαούρτι στραγγιστό, 0% λιπαρά
• 150 γρ / 5,3 oz Φέτα, θρυμματισμένη στο μούλτι
• Λίγο ψιλό, άσπρο Πιπέρι
Υλικά για την επικάλυψη/γαρνίρισμα:
• 250-300 γρ / 8,8-10,5 oz Ντοματίνια κονφί, στραγγισμένα
• 25 τεμ. μικρή Κάπαρη, στραγγισμένη
• Περίπου 35 Φύλλα Κάπαρης τουρσί, στραγγισμένα
• ½ κ.γ. ξερή Ρίγανη (προαιρετικά)
• Λίγες σταγόνες Κρέμα Μπαλσάμικο
ΜΕΘΟΔΟΣ:
Α. Ετοιμάστε τη βάση:
Σημείωση: Υπάρχουν 2 τρόποι για να θρυμματίσετε τα λεπτά παξιμάδια χαρουπιού και σίκαλης: στον επεξεργαστή τροφίμων ή στο μπλέντερ.
* Χρησιμοποιώντας επεξεργαστή τροφίμων (μούλτι), θα έχετε χοντροκομμένα τρίμματα. Όταν τα αναμείξετε με το ελαιόλαδο, έχετε μια εύθρυπτη αλλά πολύ τραγανή βάση.
* Χρησιμοποιώντας μπλέντερ, θα έχετε ψιλοκομμένα τρίμματα, σχεδόν πούδρα. Όταν τα αναμείξετε με το ελαιόλαδο, έχετε μια πιο στερεή, ομοιόμορφη βάση, όχι τόσο εύθρυπτη αλλά και όχι τόσο τραγανή. Εγώ χρησιμοποίησα τον επεξεργαστή τροφίμων.
1. Σε ένα μεγάλο μπολ ανακατέψτε τα 2 είδη από τρίμματα παξιμαδιών και αναμείξτε τα καλά.
2. Ρίξτε μέσα το ελαιόλαδο και ανακατέψτε να βραχούν τα τρίμματα και να ενσωματωθεί το λάδι.
3. Βάλτε το μείγμα στον πάτο μιας φόρμας με τσέρκι (με άνοιγμα στο πλάι) των 18 εκ. / 7 in. και με το κουτάλι σας πιέστε το να καλύψει όλη την βάση και να ισιώσει.
4. Σκεπάστε τη φόρμα με πλαστική μεμβράνη και βάλτε στο ψυγείο να κρυώσει για τουλάχιστον 1 ώρα.
Β. Ετοιμάστε τη γέμιση με τυρί κρέμα:
5. Σε ένα μεγάλο μπολ ανακατέψτε μαζί το γιαούρτι, το τυρί κρέμα και την θρυμματισμένη φέτα.
6. Πασπαλίστε επίσης λίγο ψιλό λευκό πιπέρι.
7. Αναμείξτε καλά μέχρι να ομογενοποιηθούν τα τυριά.
8. Σκεπάστε το μπολ με πλαστική μεμβράνη και βάλτε το στο ψυγείο να κρυώσει για τουλάχιστον 1 ώρα.
Γ. Φτιάξτε το Cheesecake:
9. Μετά από τουλάχιστον μία ώρα, φέρτε τη βάση και τη γέμιση από το ψυγείο.
10. Με μια σπάτουλα καλύψτε τη βάση με τη γέμιση και μετά ισιώστε την επιφάνειά της.
11. Ανοίξτε απαλά το τσέρκι και αφαιρέστε τα πλαϊνά της φόρμας.
12. Τοποθετήστε το Cheesecake σε μια ωραία, στρογγυλή πιατέλα σερβιρίσματος.
Δ. Γαρνίρετε το αλμυρό Cheesecake μόλις 30 λεπτά πριν το σερβίρετε:
13. Ψήστε τα ντοματίνια στο φούρνο. Βγάλτε τα και αφήστε τα να κρυώσουν. Αυτό μπορεί να γίνει πολλές μέρες πριν!
14. Τοποθετήστε τα φύλλα κάπαρης τουρσί και την κάπαρη ανάμεσα σε χοντρό χαρτί κουζίνας για να απορροφηθούν όλα τα υγρά τους.
15. Γαρνίρετε το Cheesecake, βάζοντας τα φύλλα κάπαρης γύρω-γύρω στις άκρες του τσιζκέικ.
16. Στη συνέχεια απλώστε τα ντοματίνια κονφί στη μέση. Μην χρησιμοποιήσετε το λάδι στο οποίο είχαν μαγειρευτεί.
17. Σκορπίστε τη μικρή κάπαρη γύρω από τα ντοματίνια.
18. Στη μέση βάλτε λίγα φύλλα κάπαρης για να γαρνίρετε περαιτέρω το τσιζκέικ.
19. Κάντε μικρές διορθώσεις στο γαρνίρισμα σας.
20. Προαιρετικά, μπορείτε να πασπαλίσετε από πάνω και λίγη ρίγανη.
21. Και για τελευταία πινελιά, ρίξτε μερικές σταγόνες από την κρέμα μπαλσάμικο για να διακοσμήσετε το κέικ.
22. Τοποθετήστε το Cheesecake στο ψυγείο 15’ πριν το σερβίρετε.
23. Και σερβίρετε το πολύ κρύο!
Ε. Πρόταση σερβιρίσματος:
Το αλμυρό Cheesecake είναι το ιδανικό, εύκολο κρύο πιάτο για να σερβιριστεί ως ορεκτικό ή 1ο πιάτο.
Τέλειο και για Kοκτέιλ πάρτι που θα το βάλετε ως κεντρικό πιάτο στον μπουφέ σας.
Ο συνδυασμός της τραγανής, γήινης βάσης με την πικάντικη, ελαφριά τυρώδη γέμιση και τη γλυκύτητα της ντομάτας με νότα αλμύρας από την κάπαρη είναι απλά μοναδικός.
Ποιος είπε ότι τα Cheesecake πρέπει να είναι μόνο γλυκά; Εγώ λέω σε καμία περίπτωση! Και για πείτε μου δεν είναι τόσο χαριτωμένο αυτό το πιάτο!;
Απολαύστε το.
Ζ. Πληροφορίες φύλαξης:
Τόσο η βάση όσο και η γέμιση μπορούν να φυλαχτούν χωριστά, σε δοχεία, στο ψυγείο για έως και 4 ημέρες. Το γαρνίρισμα πρέπει να γίνει την τελευταία στιγμή πριν το σερβίρισμα και κατόπιν το Cheesecake πρέπει να καταναλωθεί εξ ολοκλήρου.
Κοιτάξτε επίσης την συνταγή μου σε YouTube βίντεο, το λίνκ είναι: ΕΔΩ